This is the fourth article in my series about running Vates XCP-NG with Everpure. In the previous article, we configured iSCSI connectivity and created our first Storage Repository on a standalone FlashArray. Now, let’s take it to the next level!
Introduction
In production environments, having your VMs on a single storage array — no matter how reliable — still leaves a single point of failure at the storage layer. What happens if the entire array goes down?
This is exactly the problem Everpure ActiveCluster solves. ActiveCluster provides synchronous replication between two FlashArrays, presenting a single stretched volume that is simultaneously active and accessed on both arrays. If one array fails, the other continues serving I/O transparently — with no intervention required from the hypervisor or the administrator.
In this article, we’ll configure an ActiveCluster volume, create a Storage Repository on our XCP-NG pool backed by this stretched volume, and then put it to the test by simulating a replication link failure while a VM is running an I/O workload. Everything will be captured on video so you can see the behavior in real time.
Configuring ActiveCluster on the FlashArrays
ActiveCluster requires two FlashArrays that are connected and able to replicate synchronously. The key concept is the Pod — a container that holds volumes replicated between both arrays. Any volume placed inside a Pod is automatically stretched across both FlashArrays.
All operations below are performed from the Purity//FA GUI.
Step1 : Create a streched Pod
A Pod is the logical construct that enables synchronous replication between two FlashArrays. When you create a Pod and stretch it to a second array, both arrays maintain an identical, active copy of every volume inside that Pod.
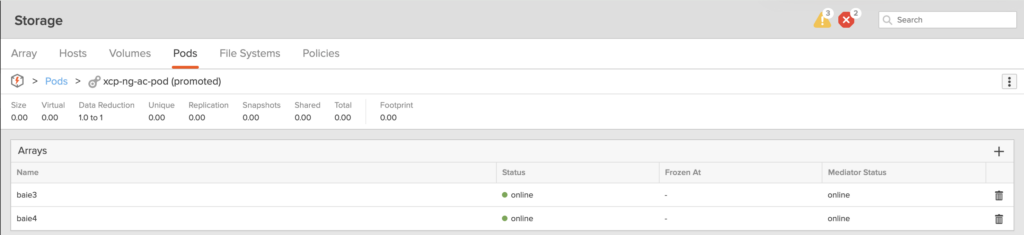
On your first FlashArray, navigate to Storage → Pods and create a new Pod. Give it a meaningful name (e.g., xcp-ng-ac-pod).
Once created, stretch the Pod to the second FlashArray. This establishes the synchronous replication link between both arrays. You’ll see the Pod status change to online on both arrays once the connection is established.
Step 2: Create a volume inside the Pod
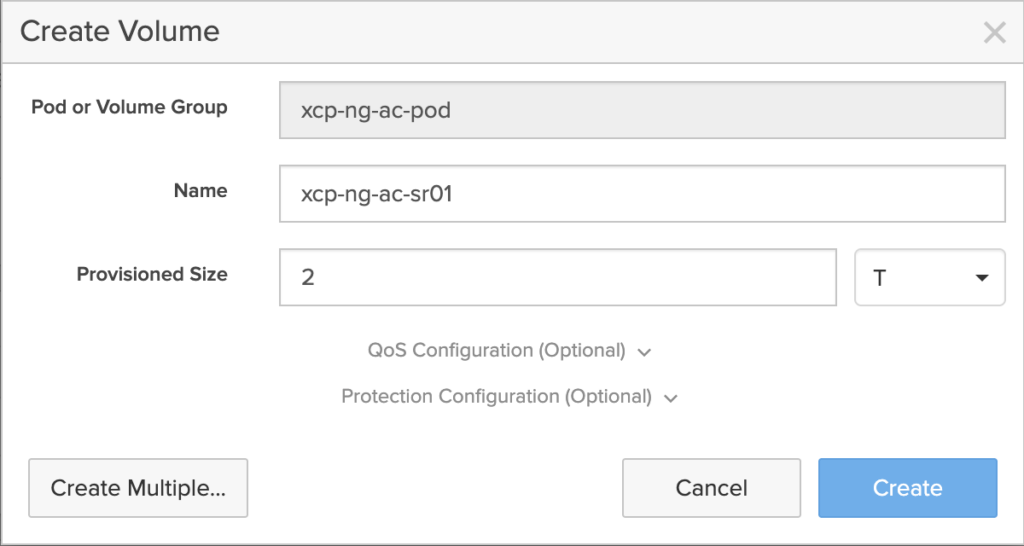
Now, create a new volume inside the Pod. This is the critical step — any volume created within an ActiveCluster Pod is automatically replicated synchronously to the second FlashArray.
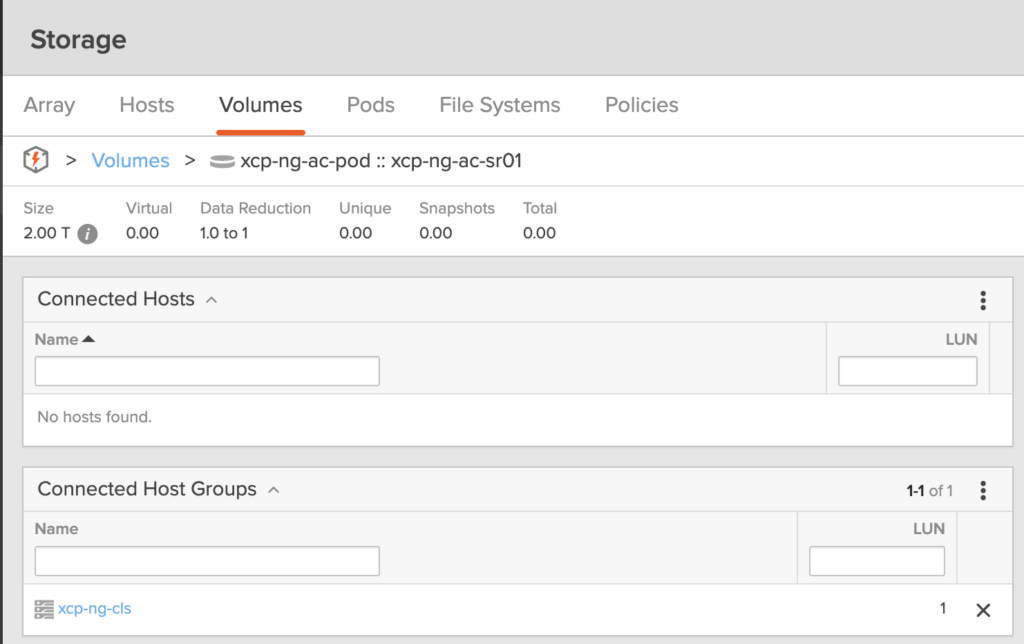
Navigate to Storage → Pods → [your pod] → Volumes and create a new volume (here we are cerating a volume which Name is xcp-ng-ac-sr01). Size it according to your needs — for this lab, we’ll provision a 2 TB volume (as always, thin-provisioned with Everpure).
Step 3: Connect the volume to the XCP-NG Host Group
Just like we did in the previous article for a standalone volume, we need to connect this ActiveCluster volume to our Host Group so that both XCP-NG servers can access it.
Important: With ActiveCluster, you need to create the Host Group and connect the volume on both FlashArrays. Each array needs to know about your XCP-NG hosts so that both can serve I/O to the cluster simultaneously.
If you already created your hosts and Host Group on the first FlashArray, you’ll need to replicate this configuration on the second array as well — same host names, same IQNs, same Host Group.
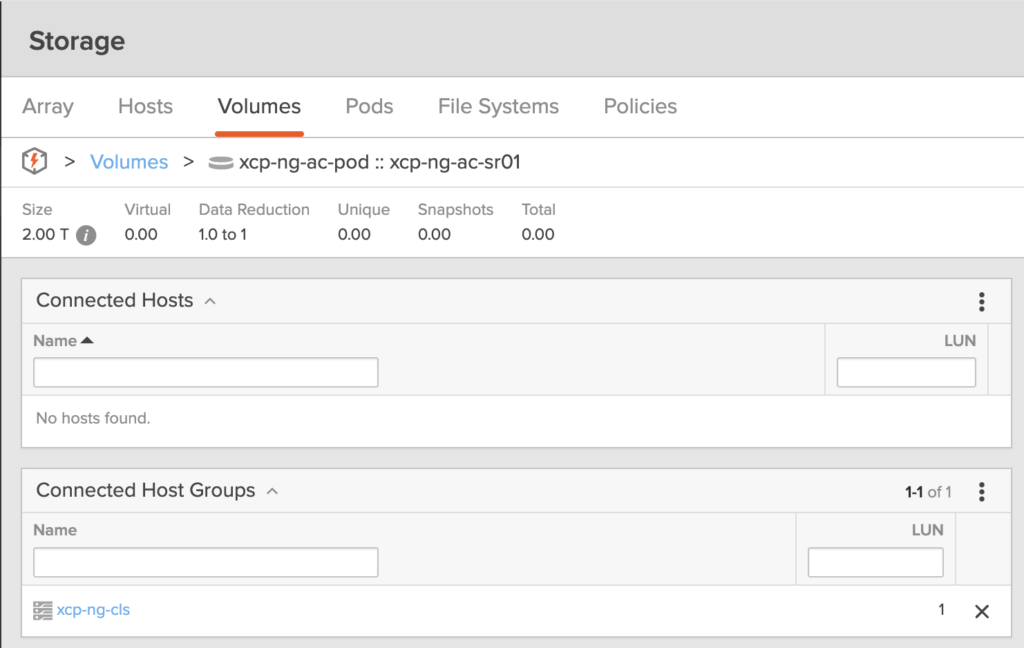
Once done, connect the Pod volume to the Host Group on both arrays.
For simplification, I will attribute the LUN 1 for this volume on both arrays, but you can let the system automatically define the LUN.
On the first array:
On the second array:
All those steps are shown in the following video
Creating the Storage Repository on XCP-NG
With the ActiveCluster volume provisioned, we can now create the Storage Repository from Xen Orchestra — using the exact same process as before.
Navigate to New → Storage → iSCSI and configure the SR just as we did in the previous article:
- Select the host to scan storage
- Name your SR (xcp-ng-ac-sr01)
- Enter a description and select iSCSI as storage type

- Enter the iSCSI target IP of either FlashArray (both will serve the same volume) and clickon the search icon so the host will discover both Targets
- Select the ActiveCluster LUN (LUN1 in this scenario)

Click Create and the SR will be available across all hosts in the pool.
Testing ActiveCluster resilience: replication link failure
Now for the most exciting part — let’s break something and see what happens.
The test scenario
We’ll simulate a loss of the replication link between the two FlashArrays while a VM is actively running an I/O workload. This scenario mimics a network outage between two sites in a metro-stretch deployment.
Here’s what we have running during the test:
- A Windows VM running on the XCP-NG pool, with its virtual disks on our ActiveCluster Storage Repository
- IOmeter running inside the VM, generating a sustained I/O workload
- The FlashArray monitoring dashboard open, showing real-time latency and IOPS on both arrays
What to expect
When the replication link goes down, each array starts the mediator race. First array that reached the mediator resume I/O while the other one remains suspended. This happens automatically and transparently.
From the XCP-NG host’s perspective, some I/O paths will become unavailable (the paths to the suspended array), but the remaining paths to the surviving array continue serving I/O. Thanks to multipathing, the VM never loses access to its storage.
The test in action
In the following video, you’ll see:
- IOmeter running with a steady workload — watch the IOPS and latency baseline
- The replication link being cut between the two FlashArrays
- The IOmeter impact — observe any latency spike or brief I/O pause during the transition
- The recovery — when the replication link is restored, the arrays resynchronize automatically